To make the stamen you will need a large button with at least 2 holes, 28 gauge wire (try the beading section of a craft store) and assorted beads with holes big enough to fit on the wire, and one crimp bead. You should have one "accent" bead for the tip of each stamen. You will also need two pieces of felt slightly bigger than the bent top of the florist's wire.
 |
| Supplies to make stamen for fabric flower |
Return to the longer piece of wire. Complete as the first side and take the wire back to the back of the button. To make the third part of the stamen you will use the same longer piece of wire you have just created the second prong of the stamen with, but take it back to the front of the button through the first hole, not the one you just exited from. If your button has more than two holes, you can use a new hole, and you will need another big bead to begin. If there are two holes to your button you will probably not have space for another big bead, but you probably won't need it, as the stamen prong you already created will block the hole somewhat.
 |
| Completed stamen |
At the back of the button take the two wire tails through a crimp bead and secure. Push the crimp bead to the side of the hole, so it can't get sucked back to the right side of the button when you begin assembling the flower.
 |
| Securing the stamen |
Cut two pieces of felt slightly bigger than the florist's wire circle you made. Now find something to act as a stopper on the unbent end of the wire. This is important as sewing this bit is unwieldly and you may have the wire waving about in front of your face. I use a silicone plug made for securing quilting pins, but you could even use a piece of apple, just something to cover that sharp end.
Now sew the wire to the felt. In theory you could probably glue it with a hot glue gun, but glue and I don't get along well, so I haven't tried that.
Now make a small snip in the center of the second piece of felt, remove your safety plug and slide the second piece of felt up the florist's wire. Reattach the safety plug. Sew the edges of the two pieces of felt together so the wire is concealed between them.
Set the felt aside and back to the flower. Take the smallest petal and make a back stitch on the back with the needle and thread. Place the stamen on the right side of the smallest petal. From the back of the flower, take the needle through the hole in the button, and back down through the other hole, as though you were sewing on a button. Be careful not to take the needle through any of the beads. Make about 5 passes through the button to secure the stamen to the first petal.
With the needle at the back of the petal take another back stitch. Attach the spacer bead.
Now take the needle through the next petal, take a back stitch, then attach the spacer bead, and repeat until you are at the back of the biggest petal. Take a back stitch.
Now for the slightly awkward part. Those of you who are capable of using glue and actually attaching only the things you were intending to attach might want to use glue at this point. Otherwise, take your florist's wire, and the petal, and sew the felt on to the bottom of the flower, being careful not to sew through more than the bottom petal. Make sure the safety plug is on the bottom of the florist's wire.
You can see that I made especially large stitches in some places so you could see them. Yes, that's what happened...
Ready?? 'Cause this is the fun part! Flip your flower over and bend those flexible petals to whatever shape your heart desires. Don't like it? Unbend and rebend. Your flower will stand proud on the wire and be very stable. You can also bend the florist's wire to fit into a vase. If you were feeling wild, you could also find some funky chenille sticks to wind around the florist's wire if you want the flower to protrude out of the vase.
 |
| Flexible fabric flower |
Ta da!
 |
| Fabric flower Ta-Da! |
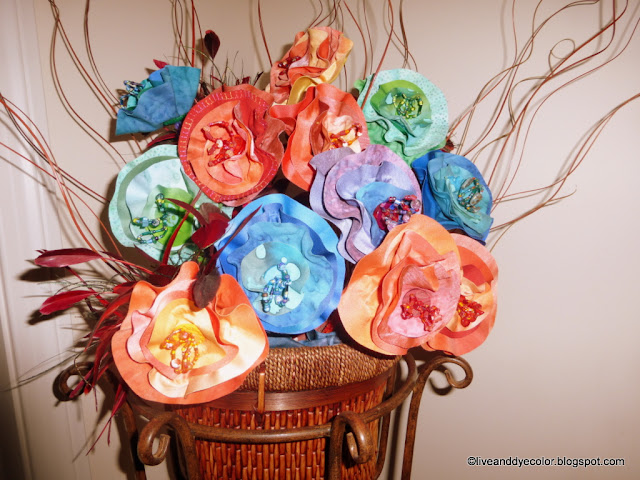
Now you can make a vase full!
 |
| Flexible fabric flower arrangement |
If the petals seem too much work, or for some contrast, you could experiment with just one base fabric petal and use the wire and beads to create the interest. The possibilities are endless!
 |
| Beaded flowers |


No comments:
Post a Comment